[Warning! this tutorial was written in August 2012, and so is probably out of date]
This tutorial aims to teach you how to create and publish a simple Facebook app in about 20 minutes using PythonAnywhere.
PythonAnywhere is a browser-based programming and web app hosting tool. It makes it really easy to get started with web programming, because you don’t need to install any software, or configure a server - we do all that stuff for you. All you need is your web browser!
Set yourself up on Facebook
OK, marketing over. Let’s get started. The first thing to do is some config on Facebook:
-
First, visit the Facebook Developer App and add it to your account
-
Click the ‘Create new App’ button and enter a name for it (I’m creating a Kurt Vonnegut status lines app). Then, hit Continue

-
Click on the App on Facebook section and fill in the Canvas URL and Secure Canvas URL fields with the following URLs:
  http://yourusername.pythonanywhere.com
  https://yourusername.pythonanywhere.com
(PythonAnywhere offers free web app hosting, which is automatically configured to use those URLS: yourusername.pythonanywhere.com)

- When you Save, we need to make a note of two things: The App ID and the Secret Key.
The App ID gives you the URL for your new Facebook app: https://apps.facebook.com/YOUR-APP-ID
Start a new web app on PythonAnywhere
Now, let’s go back to PythonAnywere, and create our web app.
-
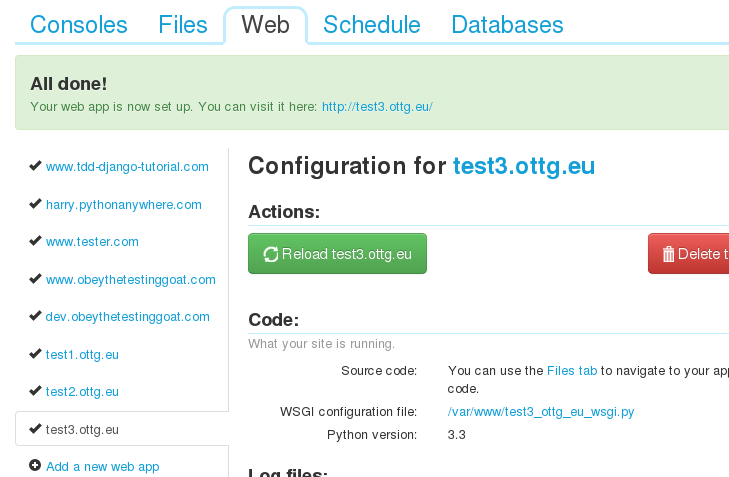
Log in to PythonAnywere and visit the Web tab.
-
Choose Add a new web App, accept the default domain, and choose the Django framework. The default name, mysite, is fine.

Coding our app
Let’s code our web app in two steps. First, we’ll see if we can extract some info from Facebook about our user. Then, we’ll give them the option to post a quote to their wall as a status update. Read and write phases, if you like.
Basic config - starting a Django project, adding in django-facebook
Django-facebook is an excellent module that helps with facebook integration in Django. Let’s start by opening up a Bash console on the Consoles tab, and starting a new app inside our django project:
cd mysite
python manage.py startapp myapp
To configure the django_facebook package, we need to add a few things to mysite/settings.py
-
Keep the console open in one tab, and open the Dashboard up in another (eg, by Ctrl+clicking the PythonAnywhere logo at the top of the page)
-
Then go to Files. Go into the
mysitefolder, then click onsettings.pyto edit it. -
in
DATABASESadd a sqlite3 database by filling in theENGINEandNAMEsections:DATABASES = { 'default': { 'ENGINE': 'django.db.backends.sqlite3', # Add 'postgresql_psycopg2', 'postgresql', 'mysql', 'sqlite3' or 'oracle'. 'NAME': '/home/yourusername/mysite/db.sqlite', # Or path to database file if using sqlite3. 'USER': '', # Not used with sqlite3. 'PASSWORD': '', # Not used with sqlite3. 'HOST': '', # Set to empty string for localhost. Not used with sqlite3. 'PORT': '', # Set to empty string for default. Not used with sqlite3. } } -
In
MIDDLEWARE_CLASSES, disable theCsrfViewMiddleware, and add theFacebookMiddleware:MIDDLEWARE_CLASSES = ( 'django.middleware.common.CommonMiddleware', 'django.contrib.sessions.middleware.SessionMiddleware', #'django.middleware.csrf.CsrfViewMiddleware', 'django.contrib.auth.middleware.AuthenticationMiddleware', 'django.contrib.messages.middleware.MessageMiddleware', 'django_facebook.middleware.FacebookMiddleware', ) -
In
INSTALLED_APPS, we adddjango_facebookand our own app,myapp:INSTALLED_APPS = ( 'django.contrib.sites', 'django.contrib.messages', 'django.contrib.staticfiles', # Uncomment the next line to enable the admin: # 'django.contrib.admin', # Uncomment the next line to enable admin documentation: # 'django.contrib.admindocs', 'django_facebook', 'mysite.myapp', ) -
At the bottom of the
settings.pyfile, we add the App ID and Secret Key for our Facebook app, which we noted down earlier, and we choose the default permissions we want for our app - in this case, we needpublish_streampermissions. Adding this setting means that, the first time the user logs in, they will automatically be asked to grant those permissions to our app:FACEBOOK_APP_ID = 'your-app-number-from-earlier' FACEBOOK_SECRET_KEY = 'your-secret-key-from-earlier' FACEBOOK_CANVAS_PAGE = 'https://apps.facebook.com/%s/' % FACEBOOK_APP_ID FACEBOOK_SCOPE = ['publish_stream']

-
Finally, we need to go back to our Bash console where we ran python manage.py startapp myapp and run the following command:
python manage.py syncdb
This will spit out some output and ask you some questions. This creates an admin user, and builds the initial database tables.

A simple page saying hello using the current Facebook user’s name
Building a web page in Django involves using a template to render the page’s HTML, a view to pass information to the template, and a url to map to the view.
- Let’s start with the template. In the Files browser, open
mysite/myapp, and create a New directory calledtemplates.

-
Inside that, create a new file called
home.html:<html> <body> <p>Hi {{me.first_name}}</p> </body> </html>
If you’ve not seen the Django template language before, you should recognise it as being pretty standard HTML, apart from the special bits inside {{ }} curly-brackets. In this case, the template wants a variable called me to be passed to it, which has info about the user. Let’s build a view to pass that in.
-
Let’s leave
home.htmlopen in a browser tab, and open a new tab to edit the next file. You’ll find some breadcrumbs links at the top, which you can Ctrl-Click or to open up the grandparent folder,myapp. Inside that, you’ll find a file calledviews.py, which we can edit now to add a simple view:from django.shortcuts import render from django_facebook.decorators import canvas_only @canvas_only def home(request): me = request.facebook.graph.get_object('me') return render(request, 'home.html', {'me': me})
The @canvas_only decorator will make sure Facebook redirects the user to a
screen where they authorize permssions for the app the first time they load it.
This alongside the FacebookMiddleware that we added to settings.py earlier
takes care of magically adding the request.facebook.graph attribute, which we
can then use to access the Facebook Graph API.
The Graph API is the main way of getting data in and out of Facebook -
everything to do with users, relationships, friendships, wall posts and so on.
You can interact with it in Python using the facebook module, and from
Javascript using Facebook’s own SDK (django_facebook has some help with this -
more on that later). In the meantime, find out more here:
https://github.com/pythonforfacebook/facebook-sdk
https://developers.facebook.com/docs/reference/api/
Finally, we need to set a url in our app to point to the home page. Let’s use
another new tab to open urls.py, which is back up in the mysite
top-level folder.
-
In
mysite/urls.py, and set one line in theurlpatterns:urlpatterns = patterns('', url(r'^$', 'mysite.myapp.views.home', name="home"), # Uncomment the next line to enable the admin: # url(r'^admin/', include(admin.site.urls)), ) -
Now, hit Reload Web App back on the Web tab of PythonAnywhere – again, opening this up in another tab is useful.
At this point, you should be able to log into your Facebook app, find it asks you for some permissions, and see it greets you by name!
Go and visit your app’s facebook URL, at https://apps.facebook.com/your-app-id/


Step 2 - Getting the app to post to the user’s Wall
Step 2 is to make our app do something - it’ll give the user a random “quote of the day”, that they can choose to post as their status.
-
Let’s update our home page template so that it contains the quote of the day, and a button they can use to update their status. In
mysite/myapp/templates/home.html:<html> <body> <p>Hi {{me.first_name}}</p> <h1>Vonnegut Quote of the Day</h1> <blockquote>{{quote}}</blockquote> <p>Or, hit reload if you want a new one...</p> <form method="POST" action="{% url update_status %}" > <input type="hidden" name="quote" value="{{quote}}" /> <input type="hidden" name="access_token" value="{{access_token}}" /> <input type="submit" value="Set as my status!"/> </form> </body> </html>
You can see that the home page now wants a quote object that it can show the
user. When it wants to update the status, it’s going to submit a form to a new
url called update_status, so we’ll need to build that. It also passes on an
access token for permissions.
-
Let’s start by modifying
mysite/urls.pyto add the new url:urlpatterns = patterns('', url(r'^$', 'mysite.myapp.views.home', name="home"), url(r'^update_status$', 'mysite.myapp.views.update_status', name="update_status"), # Uncomment the next line to enable the admin: # url(r'^admin/', include(admin.site.urls)), ) -
Now, edit
views.py. We’ll modify ourhomeview slightly, and add theupdate_statusview too:import facebook import random from django.shortcuts import render from django_facebook.decorators import canvas_only QUOTES = [ "Being a Humanist means trying to behave decently without expectation of rewards or punishment after you are dead.", "Here we are, trapped in the amber of the moment. There is no why.", "The universe is a big place, perhaps the biggest.", "Tiger got to hunt, bird got to fly; Man got to sit and wonder, 'Why, why, why?' Tiger got to sleep, bird got to land; Man got to tell himself he understand.", "If people think nature is their friend, then they sure don't need an enemy.", "We could have saved the Earth but we were too damned cheap.", "That is my principal objection to life, I think: It's too easy, when alive, to make perfectly horrible mistakes.", "All persons, living and dead, are purely coincidental.", "So it goes.", ] @canvas_only def home(request): me = request.facebook.graph.get_object('me') access_token = request.facebook.graph.access_token quote = random.choice(QUOTES) return render(request, 'home.html', {'me': me, 'access_token': access_token, 'quote': quote}) def update_status(request): quote = request.POST['quote'] access_token = request.POST['access_token'] graph = facebook.GraphAPI(access_token) graph.put_object("me", "feed", message=quote) return render(request, 'all_done.html')
Our home view does two new things: it picks a random quote to show the user, and it extracts the user’s access token, to pass it through to the form.
The update_status view then gets that access token and the quote out of the
form submission. It uses the token to create a new Facebook Graph-API object,
which we use to update the status. When that’s done we show the user an “all
done” page. Let’s edit that now, in New file called
mysite/myapp/templates/all_done.html:
<html>
    <h1>All done!</h1>
    <p>Hit refresh if you want to post another one...</p>
</body>
</html>
At this point your app should be ready! You just need to go back to the Web tab and hit Reload Web App, and you should be able to and open up your app, and see the quote of the day. Hit submit, and you’ll find it gets posted as your status on Facebook. Special!


That’s obviously a very simple app, and it’s ugly as sin, but it does show some of the basics. I’ve also chosen a particular way of implementing it (using a form, passing along the access_token, sending the Graph API request server-side), but there are lots of other ways you could do it - in particular, you could do more work client-side using the Facebook Javascript SDK. The Django-Facebook package has lots of helper tools to do that too, you can find out more here:
https://github.com/pythonforfacebook/django-facebook#templates
https://developers.facebook.com/docs/reference/javascript/FB.api/
So, why not get cracking and try and knock up a quick Facebook app yourself? Post your results here!