Update 2020-01-12
For some reason Telegram has stopped accepting wildcard HTTPS certificates for bots, so unfortunately this tutorial will no longer work on a PythonAnywhere free account. For the webhooks part of the tutorial to work, you will have to get a paying account with a custom domain. Thanks to fivechar for letting us know in the comments.
Original post
There’s an explosion of chat apps and bots at the moment, and it’s easy to see why. They’re a useful new way of interacting with computer systems, they’re interesting to code, and they’re actually surprisingly easy to create.
This blog post shows how you can get a simple bot up and running, using Telegram. Telegram isn’t as popular a messaging platform as WhatsApp or Skype, but it’s much easier to build bots for. You’ll need a normal computer and also a phone on which you can install the Telegram app. When you’ve finished working through the steps here, you’ll have a bot that can have an almost-plausible conversation with you.
It uses PythonAnywhere, which probably isn’t very surprising given the name of this blog ;-) You can do everything in here using a free PythonAnywhere account, and the bot you wind up with will be fully-functional. You’ll only need a paid-for account if your bot starts getting lots of users – of the order of thousands of messages a day.
So, without further ado, let’s get started!
Creating a bot
The first thing you need to do is tell Telegram that you want to create a bot. For this, you’ll need a Telegram account – install their app on your phone, and get it set up.
Next, start a conversation with the “BotFather”. This is a bot that Telegram themselves run, and it controls the creation and registration of bots on their platform. On the Android version of their app, here’s what you do (other platforms are similar)
- Tap on the start conversation button in the bottom right to start a new conversation.
- Tap the magnifying glass “Search” icon near the top right.
- Type “botfather”.
- Tap on the “@BotFather” that appears. Make sure it has a blue checkmark next to it
- It will display a welcome message.
- Click the “Start” button.
- Send it a message “/newbot”
- It will ask for a name for your bot. I’m going to call mine “GTDemo” but you should choose a name that’s unique to you.
- Next it will ask for a username; I’ll use “GTDemoBot”
- If all goes well, it will print out a message telling you that the bot was created. There’s one important bit of information in there that you’ll need for later: the token to access the HTTP API. It will be a long string of alphanumeric characters, maybe with a colon in it. To keep this for later, I copied the message on my phone and then emailed it to myself – not super-secure, but probably safe enough if you’re not going to be putting anything secret into your bot.
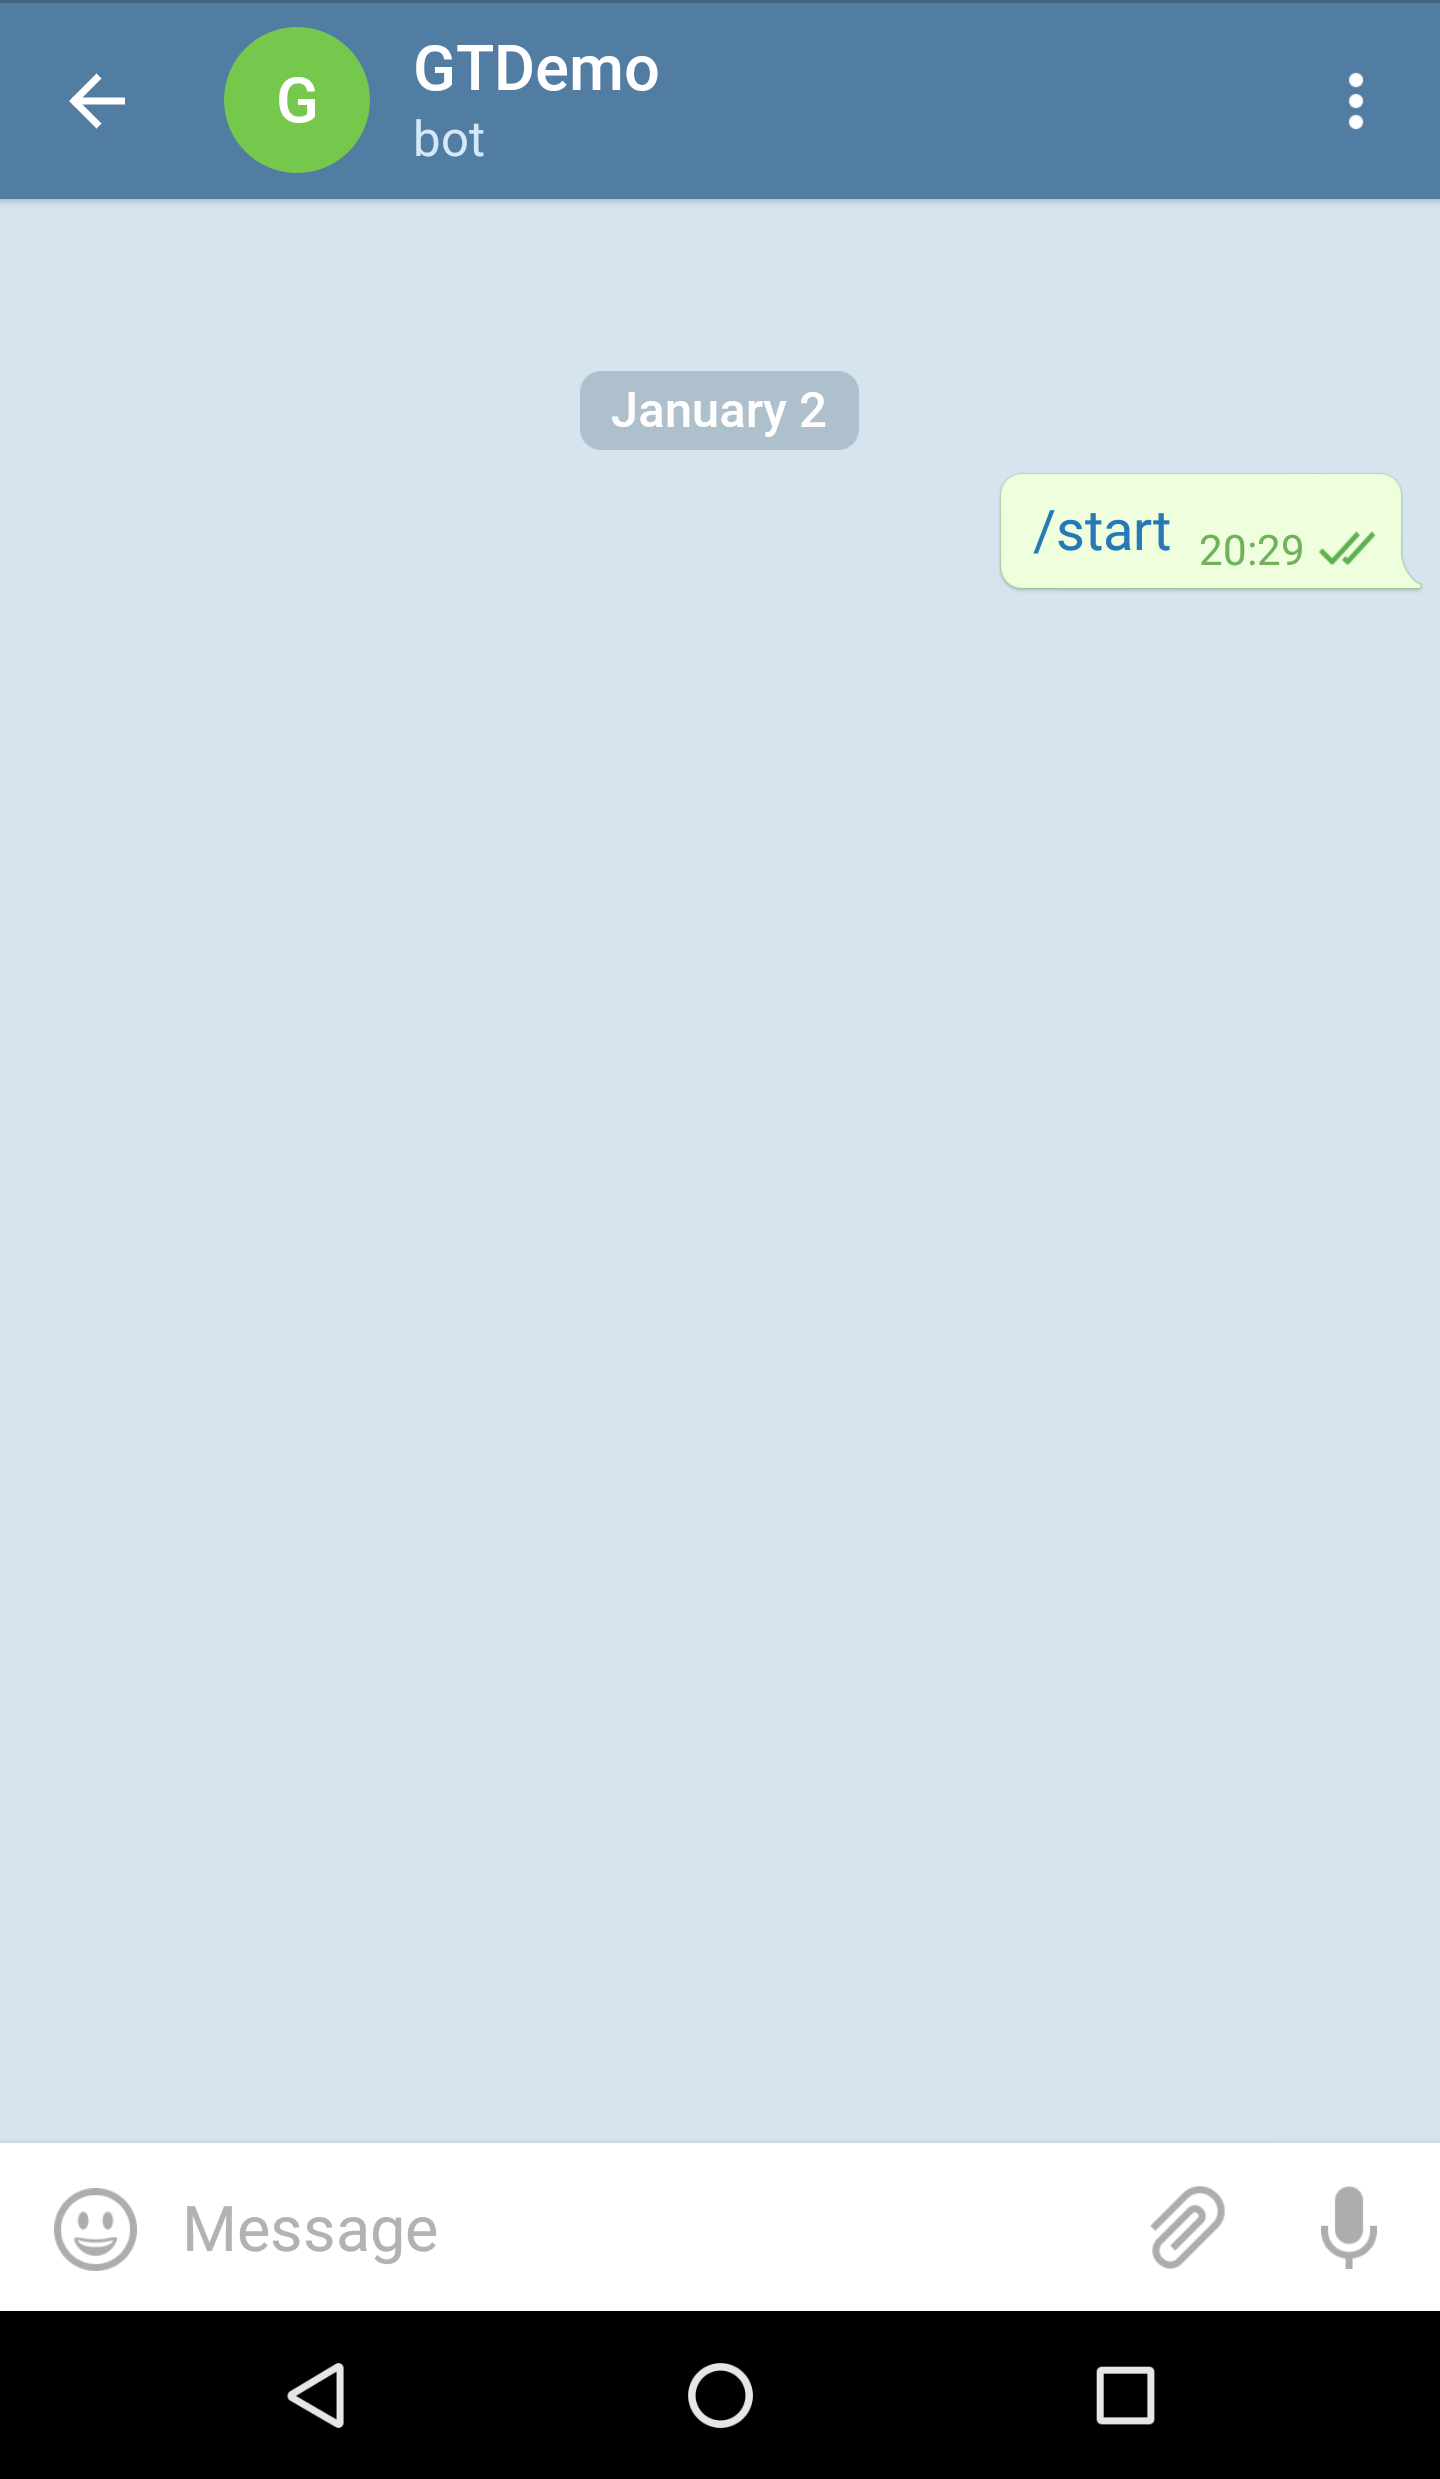
Right, so let’s check that your bot is created, even if it’s currently not very talkative. Start a conversation with it, using the same method to start a chat as you did with the BotFather. Hopefully you’ll be able to find it and start a chat, but when you click the “Start” button, nothing will happen.
No big surprise there. Let’s make it do something.
A first simple bot
On your computer:
-
I recommend you create a new PythonAnywhere account for this tutorial – we’ll be creating a website later, and if you already have a website, we don’t want to get confused between the two. You can have multiple free accounts, even using the same email address, so there’s no harm in signing up for a new one. Just create a free “Beginner” one.
-
Start a “Bash” console
-
In there, run
pip3.6 install --user telepotthis will install (for your own PythonAnywhere account) the excellent telepot Python library, which hides some of the complexities of talking to Telegram’s API. Wait for the process to complete.
-
Next, click the PythonAnywhere logo to the top left to go back to the PythonAnywhere dashboard.
-
Go to the “Files” tab.
-
In the “Enter new file name”, type a filename ending with “.py” for your bot’s code – say,
firstsimplebot.py– and click the “New file” button. -
Enter the following code, replacing “YOUR_AUTHORIZATION_TOKEN” with the token that the BotFather gave you earlier:
#!/usr/bin/python3.6 import telepot import time import urllib3 # You can leave this bit out if you're using a paid PythonAnywhere account proxy_url = "http://proxy.server:3128" telepot.api._pools = { 'default': urllib3.ProxyManager(proxy_url=proxy_url, num_pools=3, maxsize=10, retries=False, timeout=30), } telepot.api._onetime_pool_spec = (urllib3.ProxyManager, dict(proxy_url=proxy_url, num_pools=1, maxsize=1, retries=False, timeout=30)) # end of the stuff that's only needed for free accounts bot = telepot.Bot('YOUR_AUTHORIZATION_TOKEN') def handle(msg): content_type, chat_type, chat_id = telepot.glance(msg) print(content_type, chat_type, chat_id) if content_type == 'text': bot.sendMessage(chat_id, "You said '{}'".format(msg["text"])) bot.message_loop(handle) print ('Listening ...') # Keep the program running. while 1: time.sleep(10) -
Click the “»> Run this file” button at the bottom of the page.
-
A console will appear at the bottom of the page. After a little while, it should display “Listening …”
Now go back to your phone. In the chat with your bot, type “Hello”. It should almost immediately reply “You said ‘Hello’".
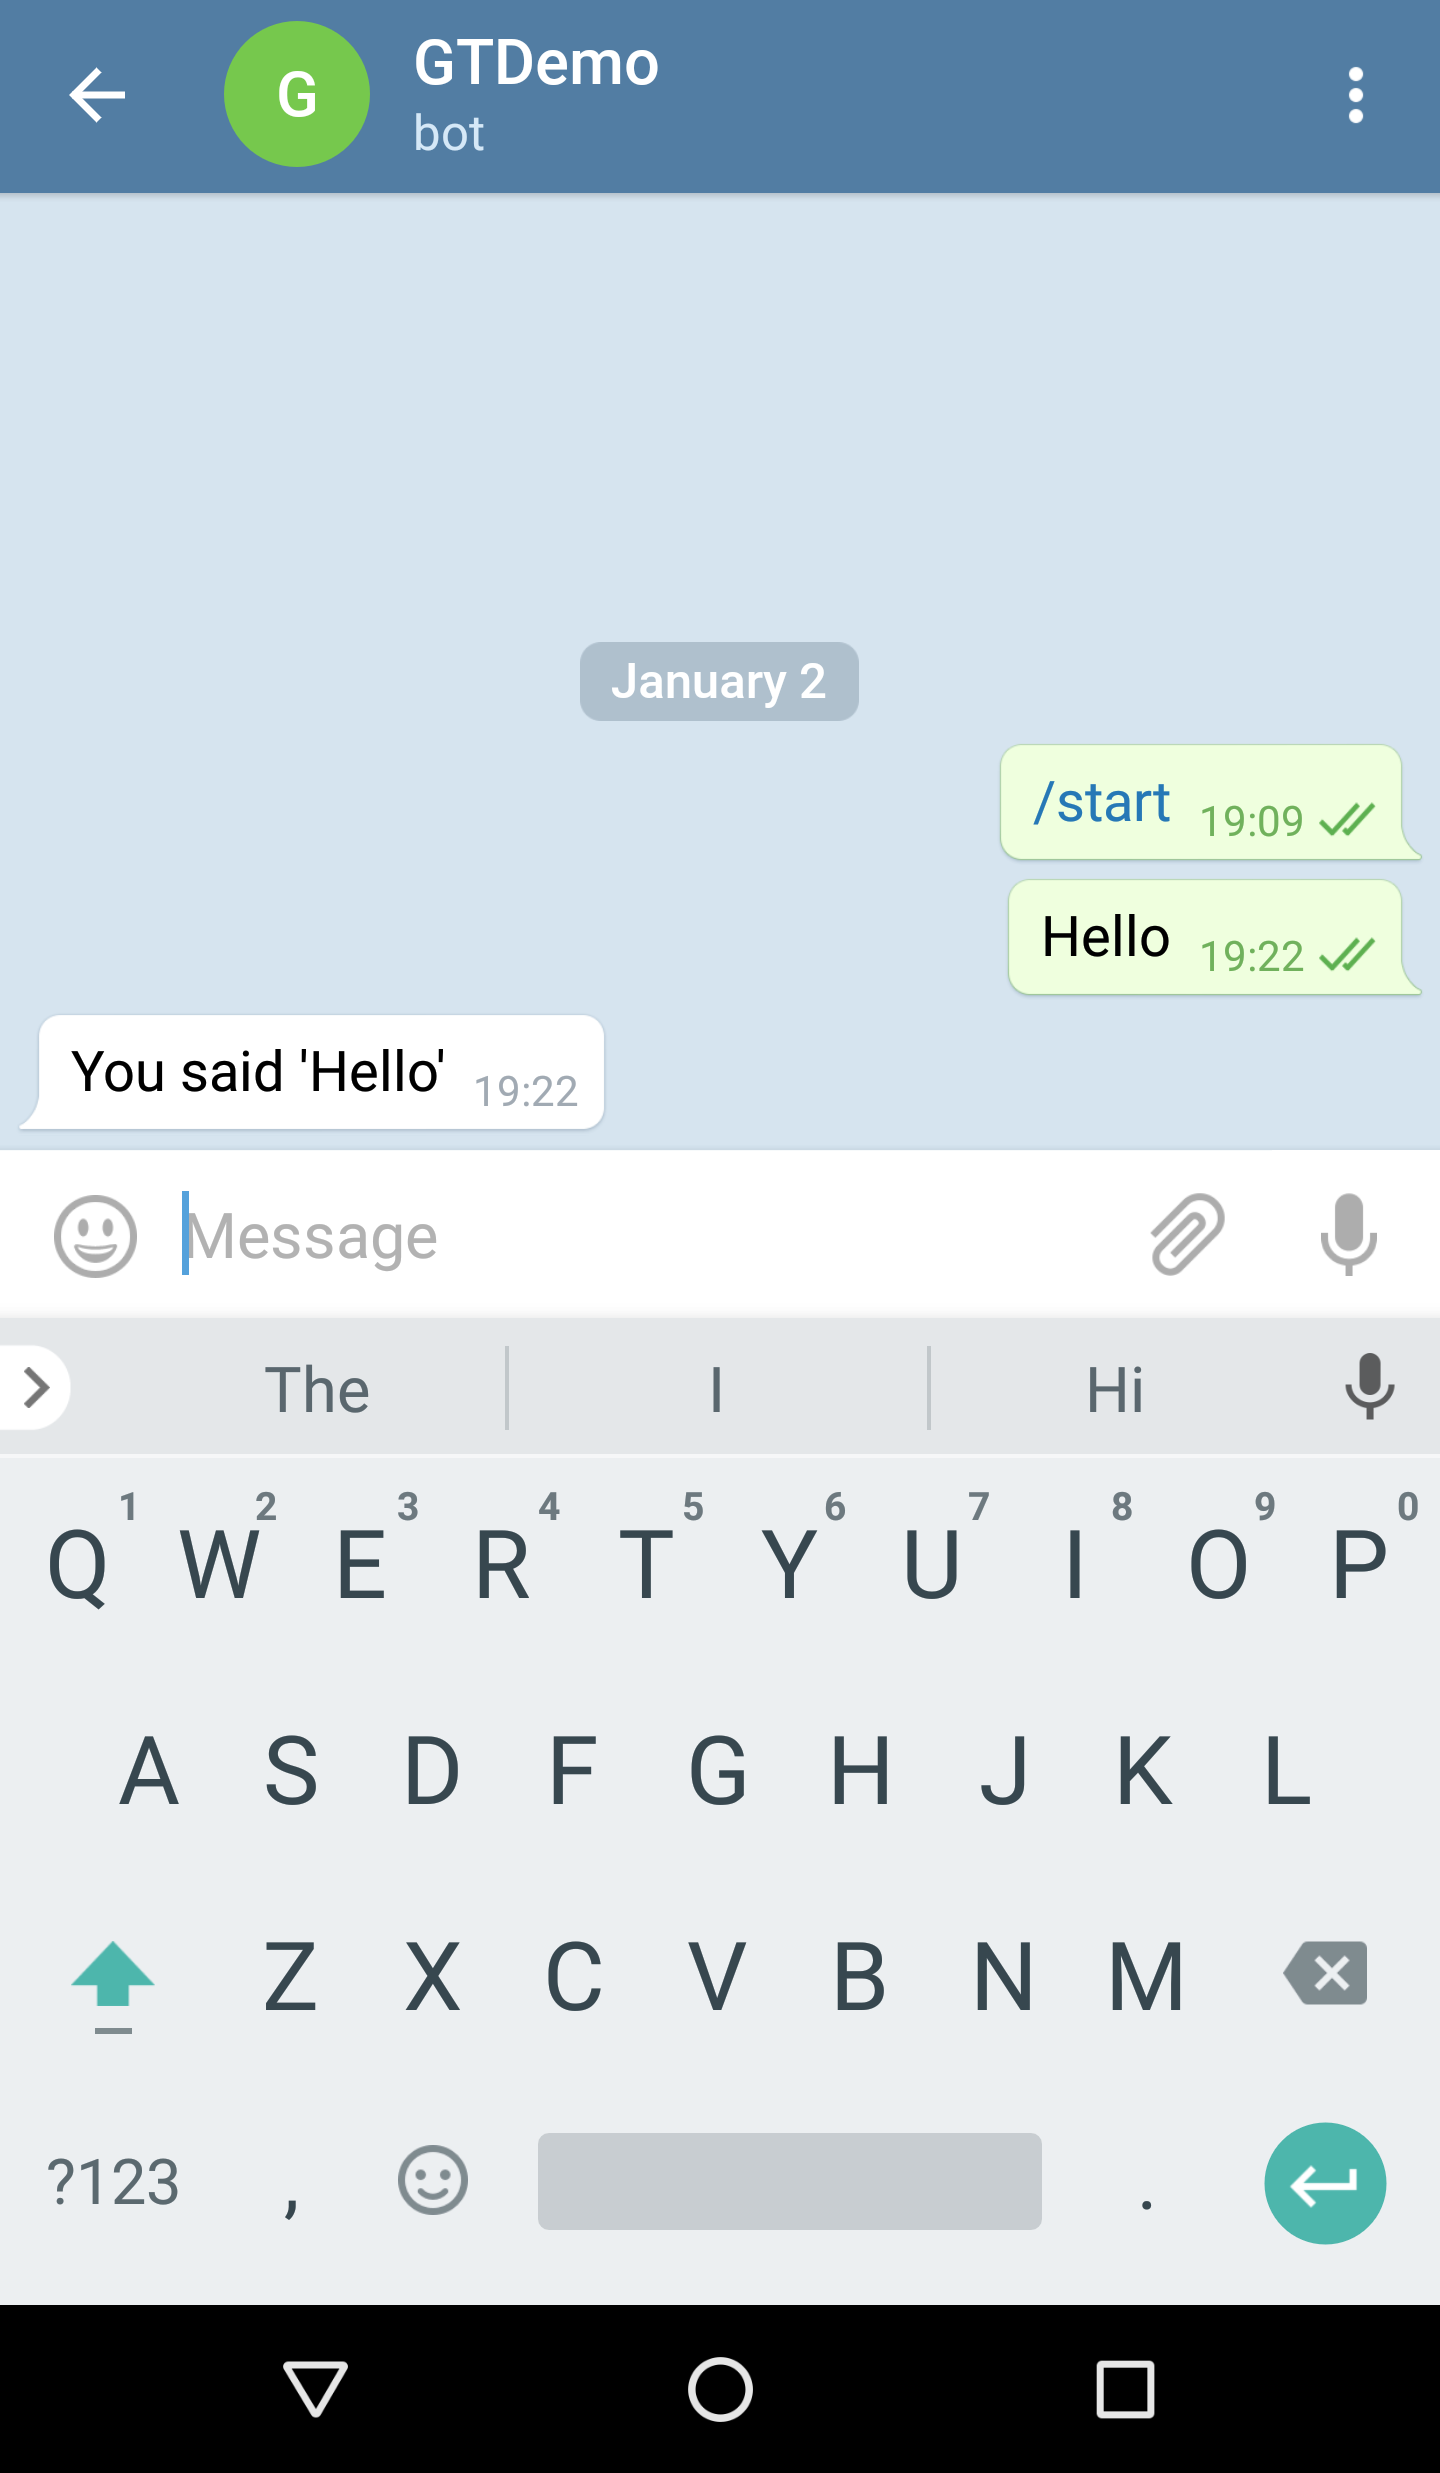
If you take another look at the console on PythonAnywhere, you’ll see that it will have printed out some information about the message – probably something like
text private 321518746
Woo! A working bot :-)
Let’s work through that code bit by bit.
#!/usr/bin/python3.6
This tells PythonAnywhere that you want to run the code using Python 3.6, which is the version of Python we installed telepot for.
import telepot
import time
import urllib3
This bit just imports the Python modules that we’re going to use.
# You can leave this bit out if you're using a paid PythonAnywhere account
proxy_url = "http://proxy.server:3128"
telepot.api._pools = {
    'default': urllib3.ProxyManager(proxy_url=proxy_url, num_pools=3, maxsize=10, retries=False, timeout=30),
}
telepot.api._onetime_pool_spec = (urllib3.ProxyManager, dict(proxy_url=proxy_url, num_pools=1, maxsize=1, retries=False, timeout=30))
# end of the stuff that's only needed for free accounts
Like the comments say, this stuff is only needed if you’re using a free “Beginner” PythonAnywhere account – we are, of course, for this tutorial, but you can remove it if you want to reuse the code in a paid account later. It’s there because free accounts can only connect outwards to particular external websites, and those connections have to go through a proxy server. Many APIs pick up the details of the proxy server automatically from their system environment when they’re running, but telepot doesn’t. It’s not a problem, it just means we have to be a bit more explicit and say “use this proxy over here”.
bot = telepot.Bot('YOUR_AUTHORIZATION_TOKEN')
Now we get to the core of the code. This line uses telepot to connect to Telegram’s server.
Next, we define a function that knows how to handle messages from Telepot.
def handle(msg):
    content_type, chat_type, chat_id = telepot.glance(msg)
The first thing we do is pull the useful information out of the message, using telepot’s glance utility function.
print(content_type, chat_type, chat_id)
…we print out some of the information, just for debugging purposes.
    if content_type == 'text':
    	bot.sendMessage(chat_id, "You said '{}'".format(msg["text"]))
We only handle text messages for the time being; speech recognition is a bit outside the bounds of this tutorial… When we get a text message, we simply reply back telling the person what they said.
So that’s the end of the message-handler function. Back to the main code:
bot.message_loop(handle)
This tells telepot to start running a message loop. This is a background thread that will keep running until the program exits; it listens on the connection that was opened to Telegram and waits for incoming messages. When they come in, it calls our handle function with the details.
print ('Listening ...')
So we print out a message to our own console to show that we’re up and running…
# Keep the program running.
while 1:
    time.sleep(10)
And then we wait forever. Like I said, the telepot message loop will only keep running until our program exits, so we want to stop it from exiting.
So now we have a working bot and we know how it works. Let’s make it better.
Moving to webhooks
The bot that you have right now is just running inside the console underneath your editor. It will actually keep running for quite a while, but if PythonAnywhere do any system maintenance work that requires restarting the server it’s on, it will stop and not restart. That’s obviously not much good for a bot, so let’s fix it.
What we’ll use is Telegram’s “webhooks” API. Webhooks are a different way of connecting to Telegram. Our previous code made an out-bound connection from PythonAnywhere to Telegram, then relied on Telegram sending messages down that connection for processing. With webhooks, things are reversed. We essentially tell Telegram, “when my bot receives a message, connect to PythonAnywhere and pass on the message”. And the “connect to PythonAnywhere” bit is done by creating a web application to run inside your PythonAnywhere account that will serve a really simple API.
If any of that sounds daunting, don’t worry. It’s actually pretty simple, and the instructions are detailed :-)
- Click on the PythonAnywhere logo to go back to the PythonAnywhere dashboard.
- On the “Consoles” tab, click on the small “X” next to the “firstsimplebot.py” console. This is important – it will kill the running bot that we’ve already created so that it doesn’t interfere with the the new one we’re about to create.
- Go to the “Web” tab.
- Click the “Add a new web app” button.
- The first page will just tell you that the web app will be hosted at your-pythonanywhere-username
.pythonanywhere.com. Click next. - On the next page, choose the “Flask” web framework. Flask is a great choice for simple websites that are designed for APIs.
- On the next step, choose “Python 3.6”. That’s the version we installed telepot for.
- On the next page, just accept the default location for your Flask app. It will be something like
/home/your-pythonanywhere-username/mysite/flask_app.py - After a short wait, you’ll see an “All done!” message and your website will be set up. There will be a link to it – follow the link and you should see a message saying “Hello from Flask!”
So now you have a simple website running that just displays one message. What we need to do next is configure it so that instead, it’s running an API that Telegram can connect to. And we also need to tell Telegram that it’s there, and which bot it’s there to handle.
- Click your browser’s “Back” button to go back to the “Web” tab.
- Look down the page a bit, and you’ll see the “Code” section.
- In that section, open the “Go to directory” link for the “Source code” in a new browser tab. (It’ll be useful to keep the “Web” tab around for later.)
- In the new tab, you’ll see the “Files” page. One file will be called “flask_app.py”; click on it to go to the editor.
Enter the following code. Don’t worry about what it does yet, we’ll go through that in a second. But don’t forget to replace YOUR_AUTHORIZATION_TOKEN with your Telegram HTTP API token, and YOUR_PYTHONANYWHERE_USERNAME with your PythonAnywhere username. Also replace A_SECRET_NUMBER with a number that only you know; a good way to get one that’s properly random is to go to this online GUID generator, which will generate a unique number like “c04a4995-a7e2-4bf5-b8ab-d7599105d1d1”.
from flask import Flask, request
import telepot
import urllib3

proxy_url = "http://proxy.server:3128"
telepot.api._pools = {
    'default': urllib3.ProxyManager(proxy_url=proxy_url, num_pools=3, maxsize=10, retries=False, timeout=30),
}
telepot.api._onetime_pool_spec = (urllib3.ProxyManager, dict(proxy_url=proxy_url, num_pools=1, maxsize=1, retries=False, timeout=30))

secret = "A_SECRET_NUMBER"
bot = telepot.Bot('YOUR_AUTHORIZATION_TOKEN')
bot.setWebhook("https://YOUR_PYTHONANYWHERE_USERNAME.pythonanywhere.com/{}".format(secret), max_connections=1)

app = Flask(__name__)

@app.route('/{}'.format(secret), methods=["POST"])
def telegram_webhook():
    update = request.get_json()
    if "message" in update:
        chat_id = update["message"]["chat"]["id"]
        if "text" in update["message"]:
            text = update["message"]["text"]
            bot.sendMessage(chat_id, "From the web: you said '{}'".format(text))
        else:
            bot.sendMessage(chat_id, "From the web: sorry, I didn't understand that kind of message")
    return "OK"
Once you’ve entered the code and made sure you’ve made the three substitutions:
- Save the file
- Switch to the browser tab with your web app setup in it.
- Click the green “Reload” button near the top.
- Wait for the “spinner” to finish.
Back on your phone, send another message. This time you should get a message back saying clearly that it came from the web. So now we have a bot using webhooks!
Let’s work through the code now:
from flask import Flask, request
import telepot
import urllib3
So again, we import some Python modules. This time as well as the telepot and the urllib3 stuff that we need to talk to Telegram, we use some stuff from Flask.
proxy_url = "http://proxy.server:3128"
telepot.api._pools = {
    'default': urllib3.ProxyManager(proxy_url=proxy_url, num_pools=3, maxsize=10, retries=False, timeout=30),
}
telepot.api._onetime_pool_spec = (urllib3.ProxyManager, dict(proxy_url=proxy_url, num_pools=1, maxsize=1, retries=False, timeout=30))
Once again, the stuff we need to access Telegram from a free PythonAnywhere account.
secret = "A_SECRET_NUMBER"
Now, this is a bit of best-practice for Telegram bots using webhooks. Your bot is running as a publicly-accessible website. Anyone in the world could connect to it. And of course we really don’t want random people to be able to connect, pretending to be Telegram, and make it say inappropriate things… so, we’re going to say that the website only serves up one page, and the URL for that page is unguessable. This should make things reasonably safe. You’ll see the code for that in a moment.
bot = telepot.Bot('YOUR_AUTHORIZATION_TOKEN')
We connect to Telegram using telepot, just like we did before.
bot.setWebhook("https://YOUR_PYTHONANYWHERE_USERNAME.pythonanywhere.com/{}".format(secret), max_connections=1)
We use telepot to send a message to Telegram saying “when my bot gets a message, this is the URL to send stuff to”. This, of course, not only contains the host name for your website with your PythonAnywhere username, it also includes the hopefully-unguessable secret that we defined earlier. It’s also worth noting that it uses secure HTTPS rather than HTTP – all websites on PythonAnywhere, even free ones, get HTTPS by default, and Telegram (quite sensibly) will only send webhooks over HTTPS.
app = Flask(__name__)
Now we create a Flask application to handle requests.
@app.route('/{}'.format(secret), methods=["POST"])
def telegram_webhook():
This is some Flask code to say “when you get a POST request on the secret URL, run the following function”. If you want to learn more about how Flask works, we have a tutorial on that too.
update = request.get_json()
Telegram sends stuff to bots using JSON encoding, so we decode it to get a Python dictionary.
if "message" in update:
If the thing we received from Telegran was a message…
chat_id = update["message"]["chat"]["id"]
….get the ID of the chat session which it forms a part of…
if "text" in update["message"]:
…check whether it contains text (which will not be the case if someone – say – sends it a photo)…
            text = update["message"]["text"]
            bot.sendMessage(chat_id, "From the web: you said '{}'".format(text))
…then send the reply back using telepot…
        else:
            bot.sendMessage(chat_id, "From the web: sorry, I didn't understand that kind of message")
…if it wasn’t text, just tell the user that we didn’t understand it…
return "OK"
…and finally, once some kind of message has been sent, return something to Telegram to say that all is OK.
So now we have, and hopefully understand, a simple Telegram bot that will keep running pretty much forever! Websites on PythonAnywhere free accounts last for three months, and then you can extend them for another three months – and three months later you can extend again, and so on, as many times as you like. So as long as you’re willing to log in to PythonAnywhere four times a year, you’re all set :-)
But the bot is pretty boring at the moment. Let’s make it a little more interesting.
Introducing Eliza
Sorry, Hamilton fans, not Angelica and Peggy’s sister. Eliza is an early natural language processing system, and the normal implementation simulates a Rogerian psychotherapist – a kind of therapist who simply turns every question back on the patient. That makes it an easy one to implement and use in a bot like this.
Doubly conveniently, the Python nltk package provides an implementation of Eliza, so we don’t even need to code it ourselves.
Let’s check out how it works. Go to the PythonAnywhere dashboard, and start a new Bash console. In it, try out Eliza in a Python 3.6 interpreter like this (the answers it gives you may vary):
19:20 ~ $ python3.6
Python 3.6.0 (default, Jan 13 2017, 00:00:00)
[GCC 4.8.4] on linux
Type "help", "copyright", "credits" or "license" for more information.
>>> from nltk.chat.eliza import eliza_chatbot
>>> eliza_chatbot.respond("Hello")
'Hi there... how are you today?'
>>> eliza_chatbot.respond("I'm well")
"Why do you think you're well?"
>>> eliza_chatbot.respond("I'm not sure")
'How does being not sure make you feel?'
>>> eliza_chatbot.respond("A little confused, to be honest")
'Very interesting.'
>>> eliza_chatbot.respond("Is it?")
'Why do you ask that?'
OK, that should give you the feel of how it works. Let’s code it up.
-
Go back to the dashboard, to the “Files” tab, then to your Flask app’s code (probably inside
mysite/flask_app.py). -
Add a new import to the top:
from nltk.chat.eliza import eliza_chatbot -
Inside the
telegram_webhookfunction, replace this line:bot.sendMessage(chat_id, "From the web: you said '{}'".format(text))with this:
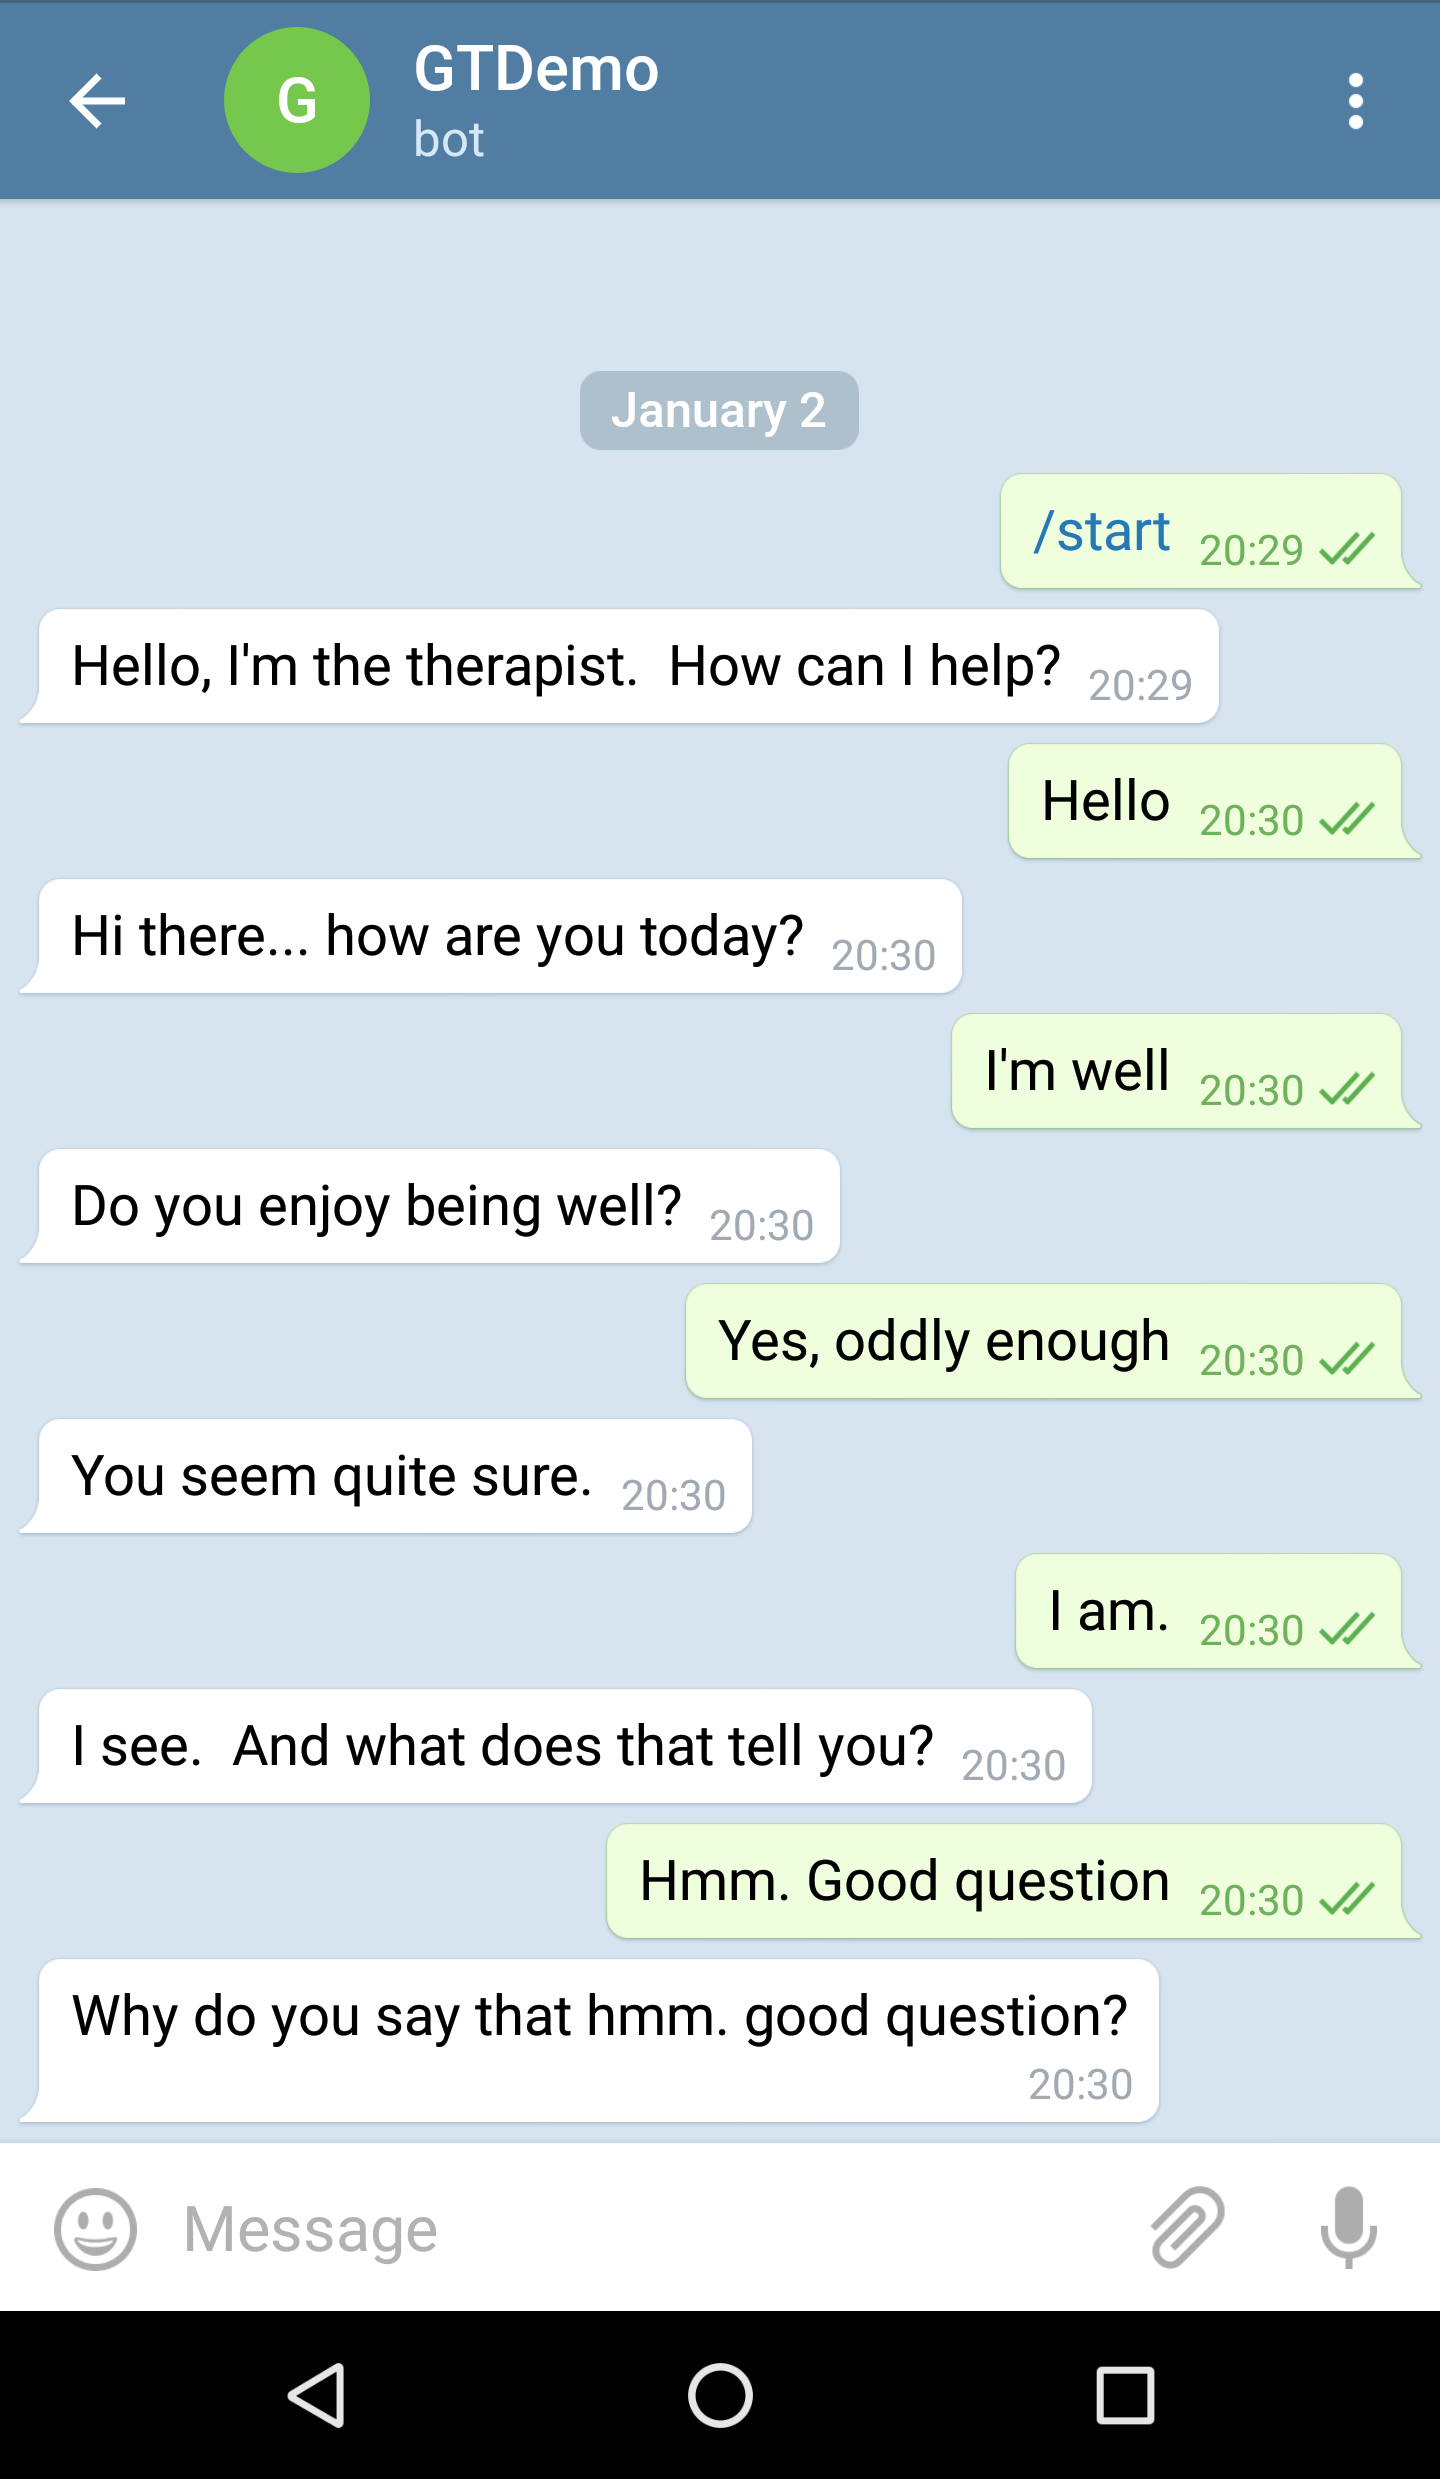
if text == "/start":
    bot.sendMessage(chat_id, "Hello, I'm the therapist.  How can I help?")
else:
    bot.sendMessage(chat_id, eliza_chatbot.respond(text))
When someone first connects to a Telegram bot, the app sends you a text message saying “/start”, so we have a special case for that so that Eliza doesn’t say something weird like “Why do you say that /start?". But all other messages we simply send to Eliza for processing, then return.
-
Save the file, then go to the “Web” tab and hit the green “Reload” button.
Back on your phone, let’s start a new session so that we can chat with Eliza afresh.
- In the old session, click the “Hamburger” menu to the top right and select “Delete chat”
- Click on the button to start a chat again, then search for your bot again, click it.
- Start the chat by clicking the “Start” button.
And now you should be able to talk to your chatbot! Many happy hours of not-very-useful therapy to be had :-)
That’s it!
That’s all for this tutorial. If you hit any problems, leave a comment below. And if you have any thoughts on how we could extend it, just let us know. Have fun, and happy botting!