Now, as you have overcome or evaded the reefs, shoals and swirls of initial development and deployment and your appetite grows, you ask “How do I automate the update and restart of my web app when I change the code?” There is already one simple and elegant method on our blog, that uses one of the possible push to publish methods, but this time we will dip our toes into vast waters of Ansible automation.
You may think that using Ansible for a simple task like this is overkill, and it’s a valid thought, but our example is a good practice case that introduces multiple elements that can be used later for much bigger projects. That’s why, instead of writing a simple bash or python script, we will build a full Ansible playbook with accompanying configuration.
Ansible uses ssh connections for remote execution so you will need a paid account that allows that.
We will use an example Django project that we normally use to test our helper scripts. That will add some Django specific stuff into the Ansible playbook (migrations), but with small modifications it can be used with other web frameworks.
We assume that:
- you work on your local machine and want to remotely control your web app already deployed to PythonAnywhere;
- your web app code is stored in some remote git repository (Github, Gitlab, Bitbucket etc);
- your code is running in the virtual environment and has its requirements defined in a
requirements.txtfile in the root of the repository.
First you will need to install Ansible on your machine. You will find a nice installation guide in the official Ansible documentation. Note that Windows is not supported for the control node so you will need Cygwin or Windows subsystem for Linux to execute Ansible playbooks on a Windows machine.
Let’s create an ansible subdirectory where we will store our ansible-related files.
$ mkdir ansible
$ cd ansible
We will start our Ansible configuration with creation of an inventory of machines that we want to make Ansible run
things on. By default Ansible looks into /etc/ansible/hosts, but we will create a local file that explicitly informs
Ansible about the desired list of machines. Not surprisingly, there will be only one machine defined in it.
Our inventory file will look like that:
[pythonanywhere]
ssh.pythonanywhere.com

[pythonanywhere:vars]
ansible_ssh_user=newpythonanywhereuser
Note that here we use an example user called newpythonanywhereuser. You should replace it with your own username.
If your account is on our European site eu.pythonanywhere.com, you need to replace ssh.pythonanywhere.com with
ssh.eu.pythonanywhere.com
Then we will create a simple ansible.cfg file to inform Ansible that we want to use the inventory file that we have
just created.
[defaults]
inventory=inventory
As we will be using PythonAnwyhere API, you will need your API token. To get it, log in to PythonAnywhere, and go to the “Account” page using the link at the top right. Click on the “API token” tab; if you don’t already have a token, it will look like this:
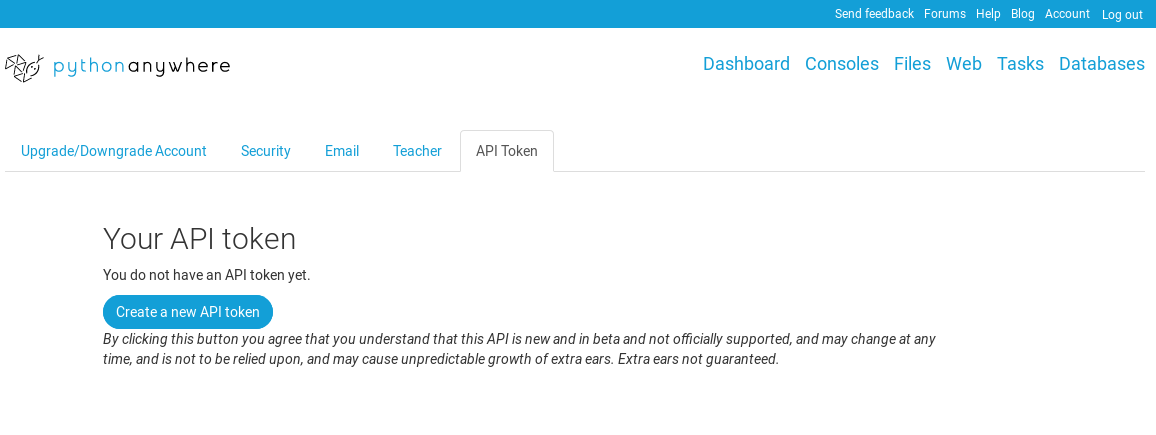
Click the “Create a new API token” button to get your token, and you’ll see this:
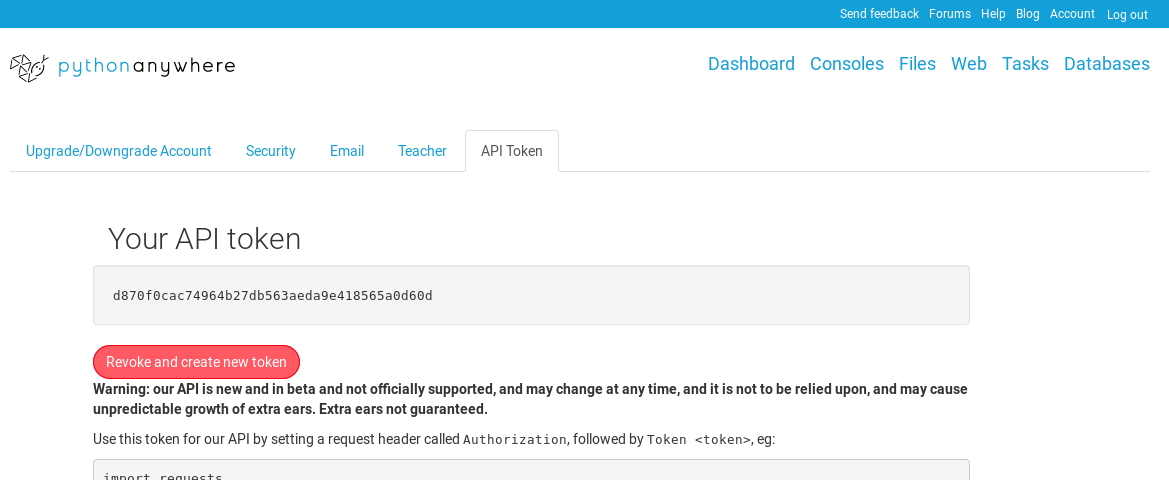
That string of letters and numbers (d870f0cac74964b27db563aeda9e418565a0d60d in the screenshot) is an API token, and anyone who has it can access your PythonAnywhere account and do stuff – so keep it secret. If someone does somehow get hold of it, you can revoke it on this page by clicking the red button – that stops it from working in the future, and creates a new one for you to use.
Fortunately Ansible provides the Vault, a mechanism to
keep secrets in encrypted files. Let’s create one named vars.yml.
$ ansible-vault create vars.yml
That will ask you for the new password and drop you into your editor of choice
(evergreen vi by default). You need to add only two lines to define the
api_token variable in the beloved yaml format. Maybe you don’t like yaml?
Well, it could have been XML.
---
api_token: d870f0cac74964b27db563aeda9e418565a0d60d
Again, remember to replace the example value with your real token.
Now, we can write our playbook called update.yml.
First we will tell Ansible that we want to run it on pythonanywhere that we defined in our inventory
---
- hosts: pythonanywhere
Then we will set some variables to keep our playbook DRY.
  vars:
    home: /home/newpythonanywhereuser/
    app_path: "{{ home }}newpythonanywhereuser.pythonanywhere.com/"
    virtualenv: "{{ home }}.virtualenvs/newpythonanywhereuser.pythonanywhere.com"
We will include our secret api_token from encrypted vars.yml file
  vars_files:
    vars.yml
We can start performing tasks. The first one is to pull our git repo if needed.
  tasks:
  - name: update code
    git:
      repo: 'https://github.com/filiplajszczak/example-django-project.git'
      dest: "{{ app_path }}"
      update: yes
The second is to update dependencies in our virtual environment
  - name: update requirements
    pip:
      requirements: "{{ app_path }}requirements.txt"
      virtualenv: "{{ virtualenv }}"
The third is to apply migrations if we changed our models. You have to remember to generate and commit them.
  - name: apply django migrations
    django_manage:
      command: migrate
      app_path: "{{ app_path }}"
      settings: myproject.settings
      virtualenv: "{{ virtualenv }}"
And the last step is to reload your web app to apply your new code. As we do not have a PythonAnywhere Ansible module yet,
we will use one of our
helper scripts so remember to include the pythonanywhere
package in your requirements.txt file. This is where the api_token is used.
  - name: reload web app
    shell: "{{ virtualenv }}/bin/pa_reload_webapp.py newpythonanywhereuser.pythonanywhere.com"
    environment:
      API_TOKEN: "{{ api_token }}"
Your ansible subdirectory should look like this now:
ansible
├── ansible.cfg
├── inventory
├── update.yml
└── vars.yml
One extra step that might be required to execute your playbook is to create and copy your public ssh key to PythonAnywhere.
If you do not have one, run:
$ ssh-keygen
and follow the instructions.
If you created a key pair or you already have one, you can upload your public key to PythonAnywhere.
$ ssh-copy-id newpythonanywhereuser@ssh.pythonanywhere.com
Again replace the example username with the real one and use ssh.eu.pythonanywhere.com if you are on our european site.
You can now execute your playbook:
$ ansible-playbook update.yml --ask-vault-pass
You will be asked for the vault password and it should all work.
All the example files we talked about in this post are available here.
So, that’s one more way to update your code on PythonAnywhere. There are others where you can combine push to your remote repository with execution of some code. It could be done using Github actions or Gitlab CI/CD pipeline. You can run your own script or execute the Ansible playbook. That would require some changes to how you manage secrets and it could be a good topic for a blog post in future.
Let us know if you have any comments or questions – otherwise, happy coding!